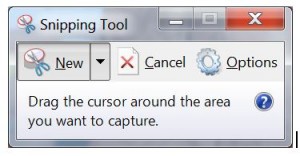
 If you’re running Windows 7, Microsoft provides a tool for grabbing all or part of any screen you’re looking at and turning it into a graphics file or copying it to the Windows clipboard: the Windows 7 Snipping Tool.
The Snipping Tool is great for quickly grabbing and saving screen shot sections (snips) for copying or saving as a graphics file, such as a .jpg, .gif, or .png file. Snipped files can be inserted or attached to blogs, emails, Web sites, tweets, Facebook posts, LinkedIn, etc. It’s easy to use, fast, and free with Windows 7. Here’s how to use it.
The first snip
When you see a Windows screen that you want to snip a piece of, click on the Windows 7 Start button and type in Snipping Tool in the search box. Click on the Snipping Tool program that shows up in the search results. You’ll see a screen that looks like this.
Bring up the Windows screen you want to snip a piece of and then come back to the Snipping Tool Window and click on New. A cross-hair will appear on your screen. Hold down your left-mouse button and drag that cross-hair over the section of the screen that you want to snip.The Snipping tool will automatically draw a box around that area, creating a sub-image from the larger screen. When you have the entire snipped area defined, let go of the mouse button. The Snipping Tool will copy and paste the boxed section of your screen into its screen.
Here’s what my Snipping Tool screen looked like after I snipped a tweet off my Twitter account (click to enlarge).
Once your snip is inside the Snipping Tool screen, you can do some minor editing such as highlighting and erasing parts of the snippet.
What to do with your snips
You have two options when you’re finished editing: 1) you can copy and paste the screen snip into another Windows program via the Windows clipboard; or 2) you can save the snip as a file.
To copy the snip to your Windows clipboard, simply type the Ctrl+C keystroke combination or select Edit–>Copy from the Snipping Tool menu bar. You’ll then be able to paste the snip into another Windows screen.
To save your snip as a file, click on File–>Save as from the menu bar and the program will let you save the snipped screen as a .gif, .jpg, .png, or an html file. Add that file to any kind of document or Web site you want and you’ve automatically added that snip to the document.
And that’s all there is to using the Snipping Tool for quick screen shot captures. It’s not the most sophisticated tool in the world, but it gets the job done when you just want to save and pull part of your screen into another document, Web site, or use it as a file all by itself.
For another example of how well the Snipping Tool works, the Seal head picture at the end of this post is a snipped extract from my home computer background picture. The Snipping Tool isn’t Photoshop, but it does come in handy for creating graphics and pulling screen information into other programs and applications.


